Workflow
‣
Choose the View to Be Rendered
- Create an Interior Camera View that shows the area of interest.
‣
- Set the Render Settings for this Camera View
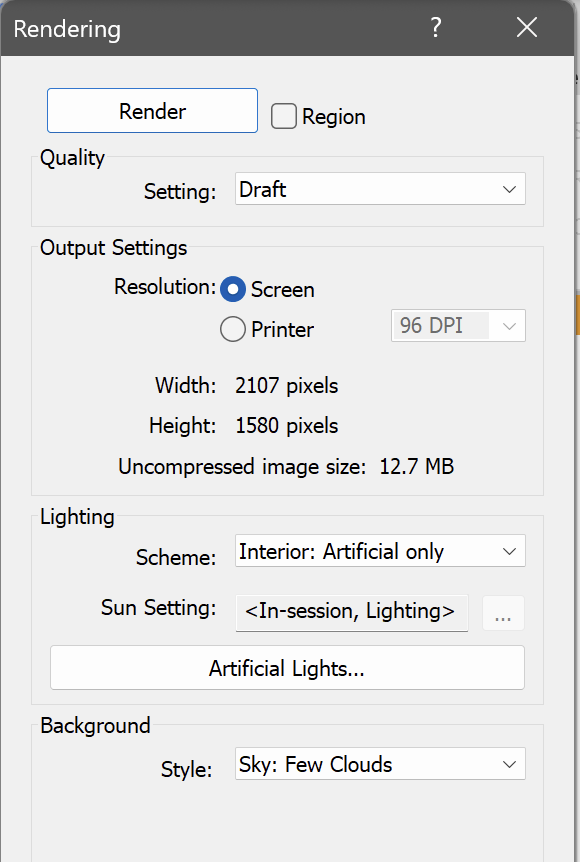
- Open the View > Presentation > Render tool
- Choose the Lighting > Scheme
- Interior: Sun Only
- Interior: Sun and Artificial
- Interior: Artificial Only
‣
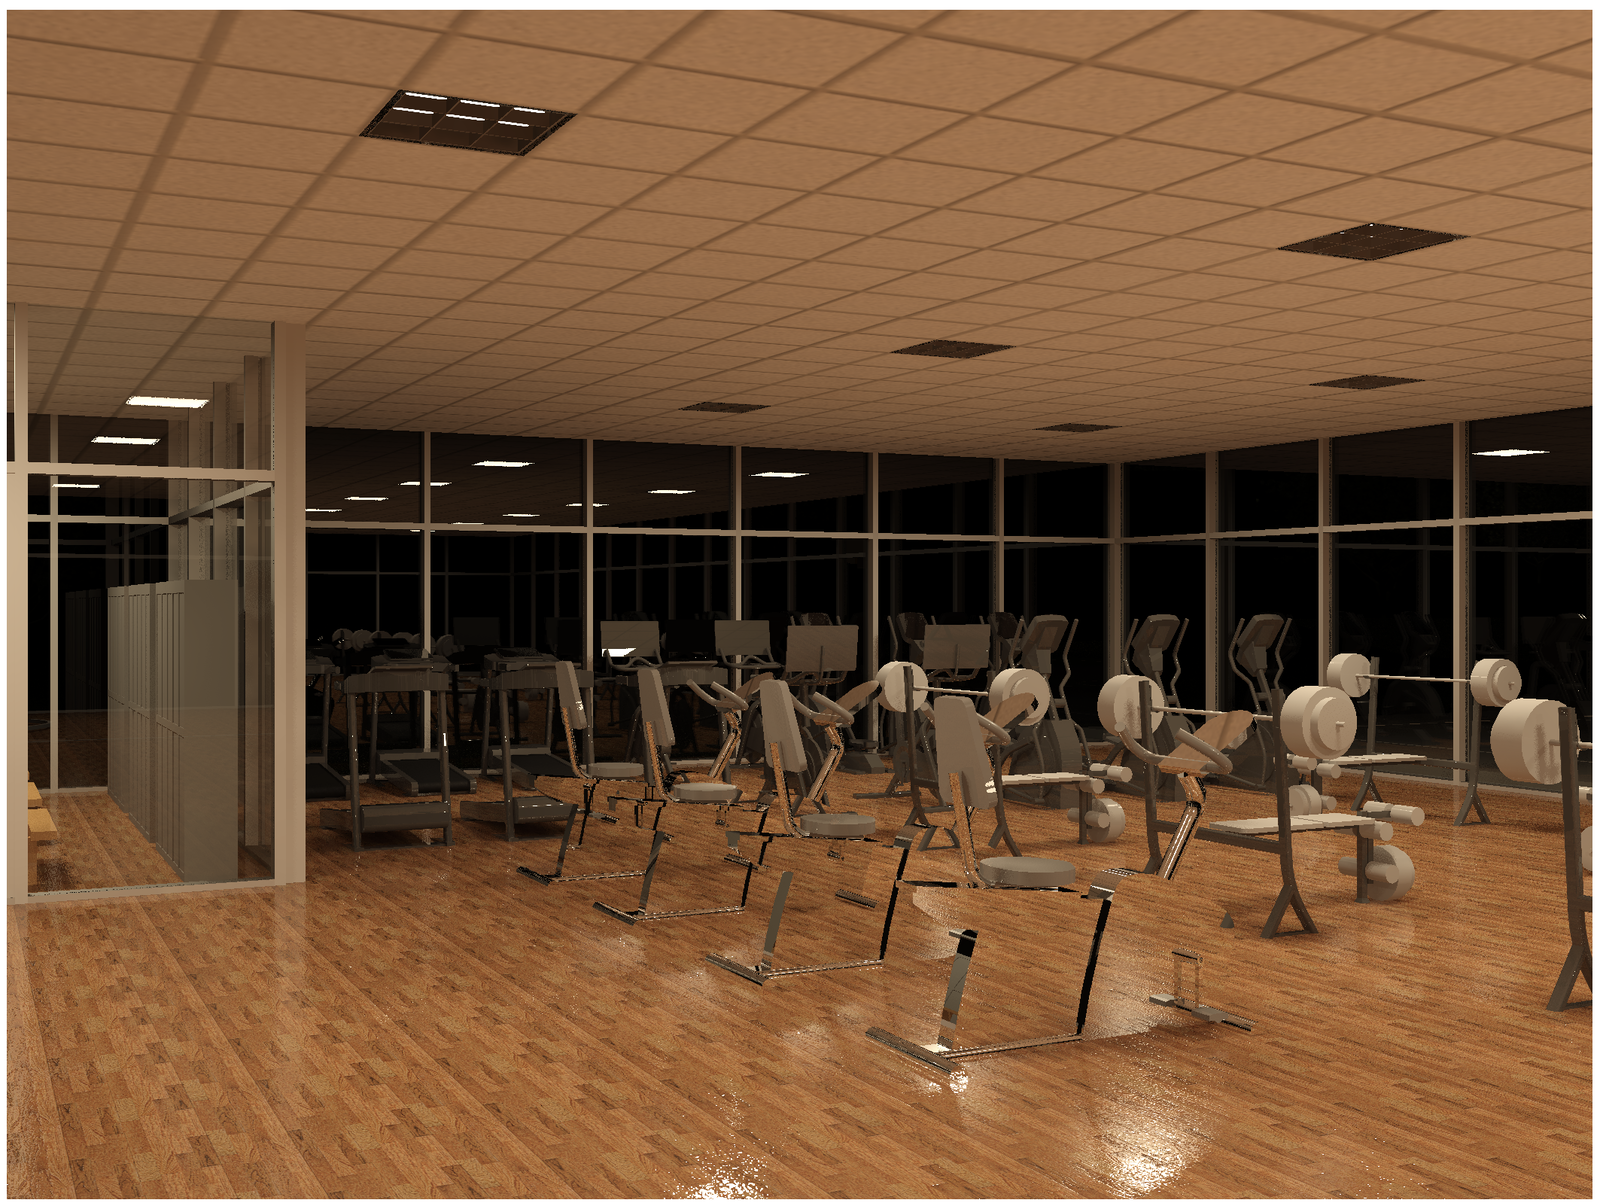
Test the Lighting Settings in Revit
- Test these lighting settings with a Draft Render in Revit.
‣
When Ready, Render this Camera View in the Cloud
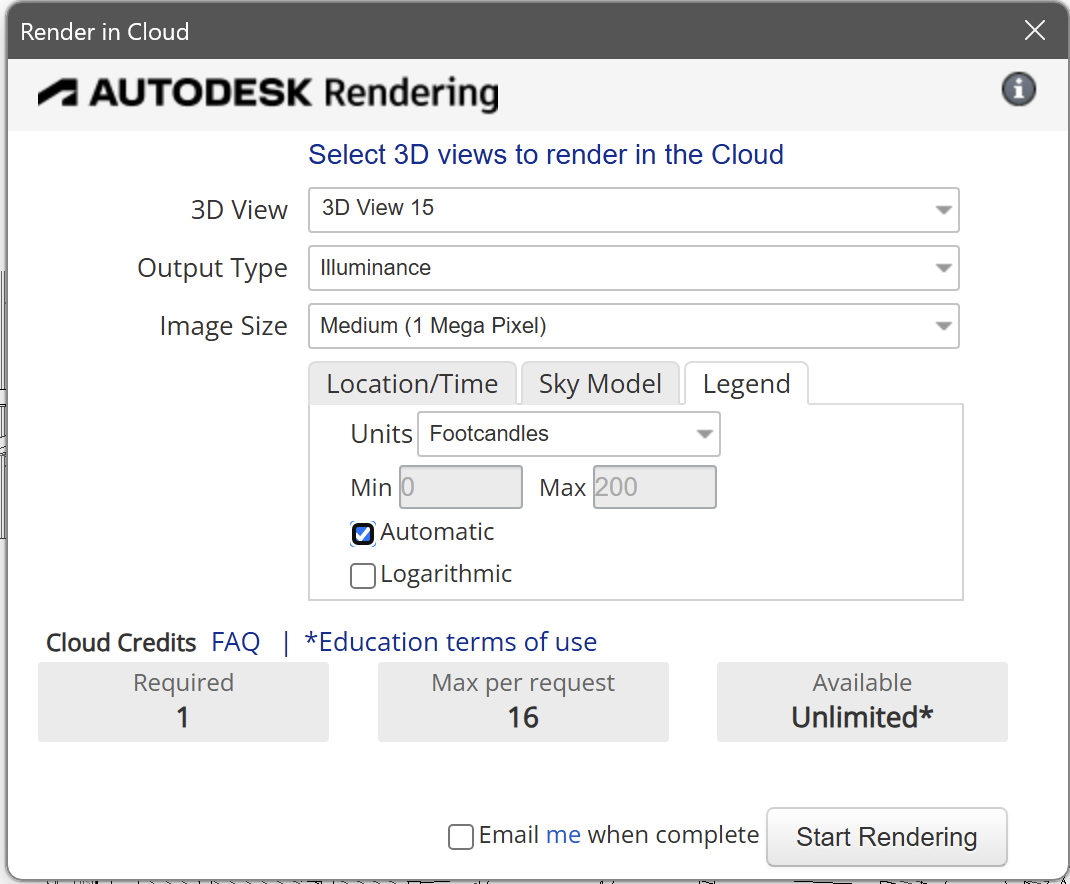
- Open the View > Presentation > Cloud Rendering > Render in the Cloud
- Choose the rendering settings:
- Output Type = Illuminance
- Location / Time (if including sun in lighting scheme)
- Legend
- Units = Footcandles or Lux
- Scaling = Fixed (enter the lowest and highest values), Automatic or Logarithmic
- Click Start Rendering
‣
View the Illuminance Rendering in the Render Gallery
- Open View > Cloud Rendering > Render Gallery
- Login to the Autodesk Rendering website using your Autodesk ID.
- Wait as the Illuminance Rendering is completed.
- The complete rendering will show illumination levels on all surfaces included in the view, using the units (footcandles or lux) you selected.
Example 1: Sunlight Only Bright near the windows (depends on position of sun)
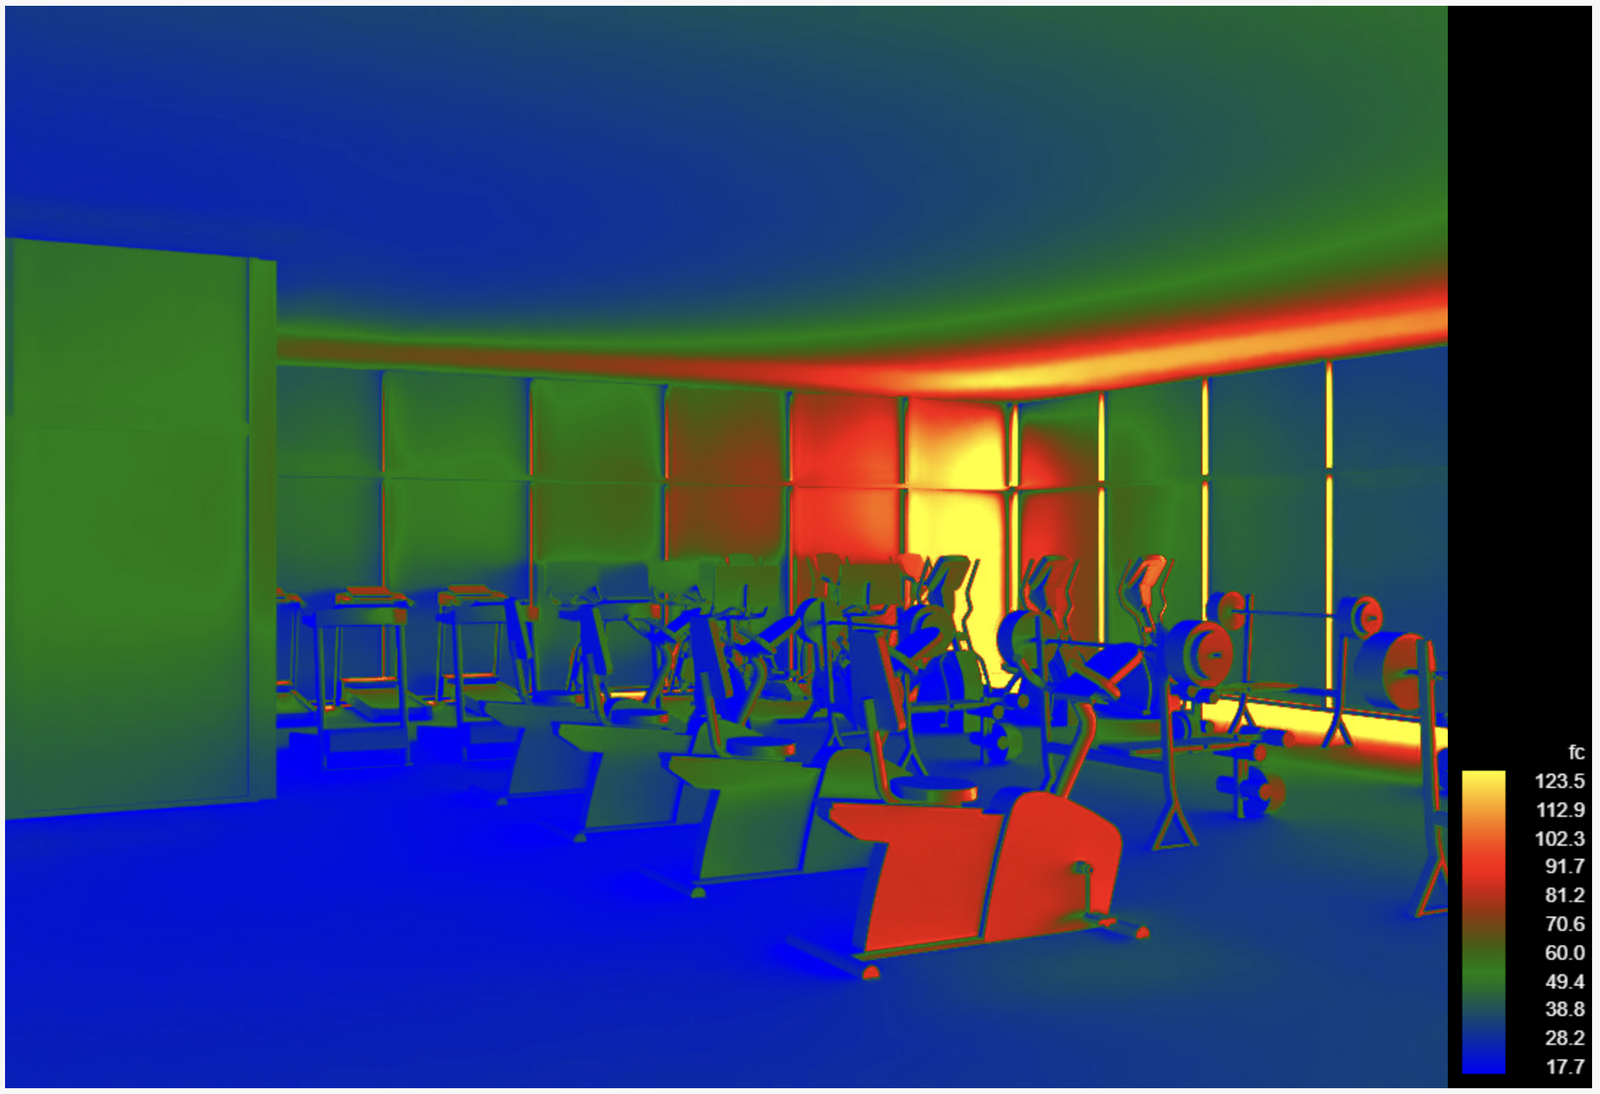
Scale = Auto So the color range focuses on the values between the lowest and highest illumination values in the image
Example 2: Artificial Lights (first trial) Fewer lights, so relatively dark (about 45 to 60 fc)
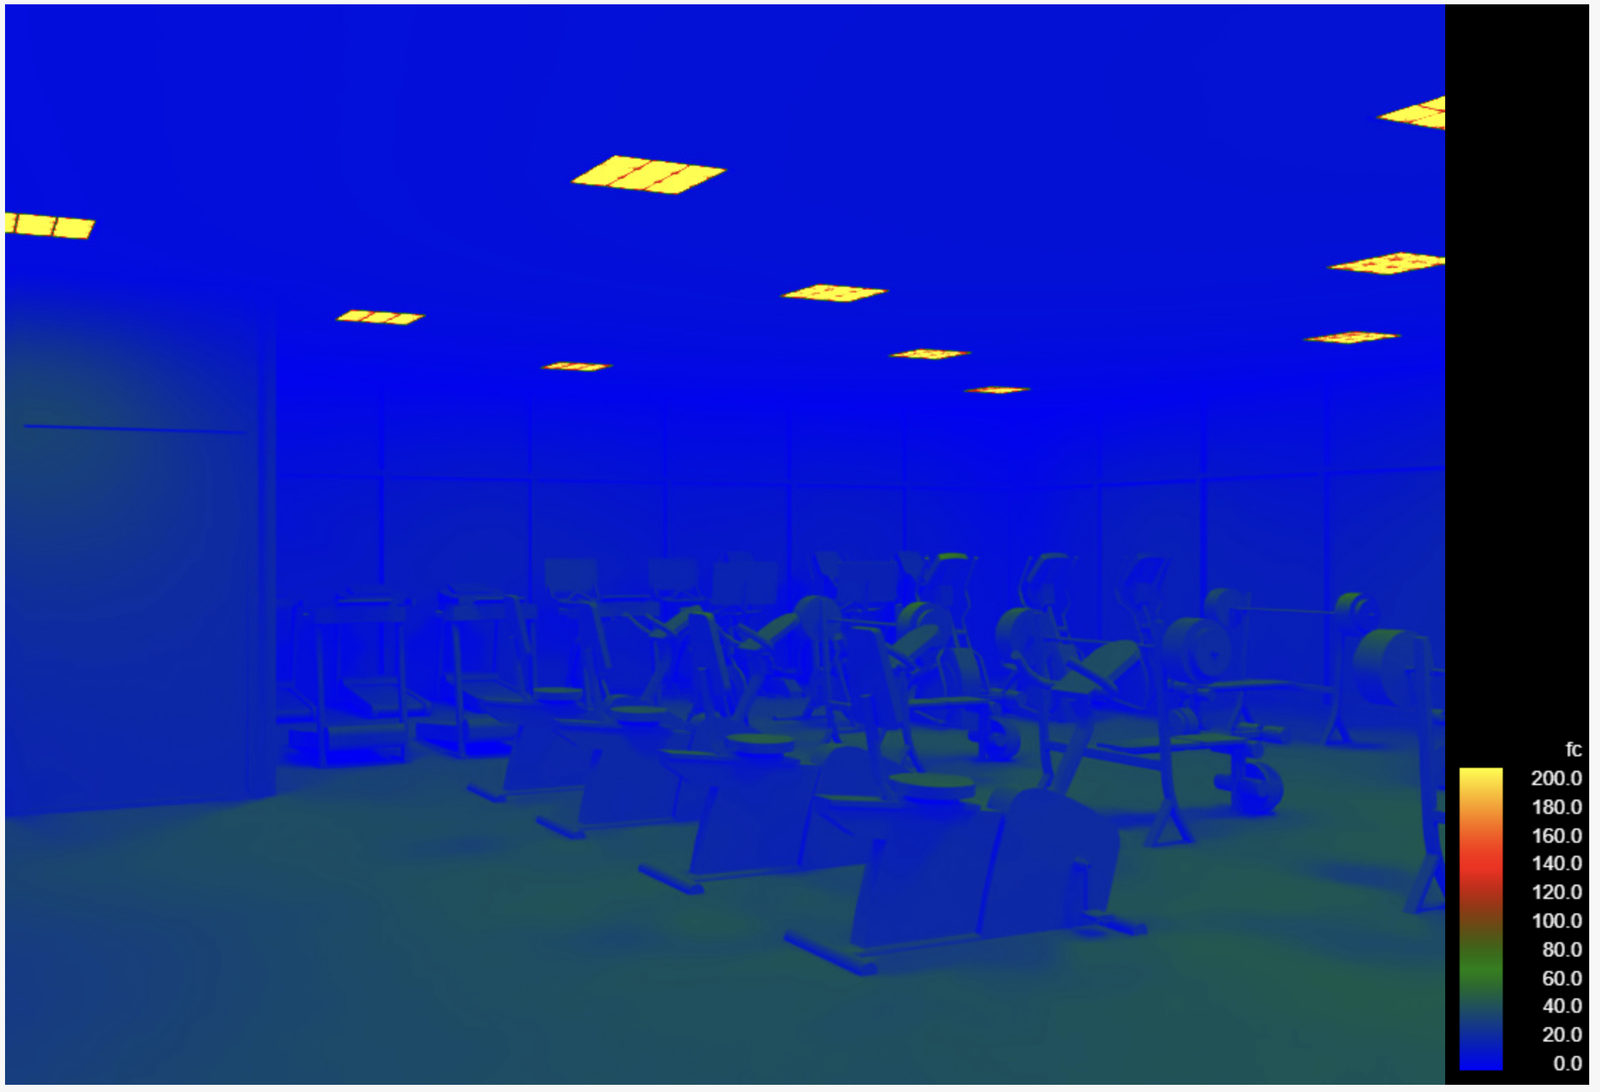
Scale = Fixed (0 to 200 fc)
Example 3: Artificial Lights (second trial) More lights, so brighter (about 85 fc)
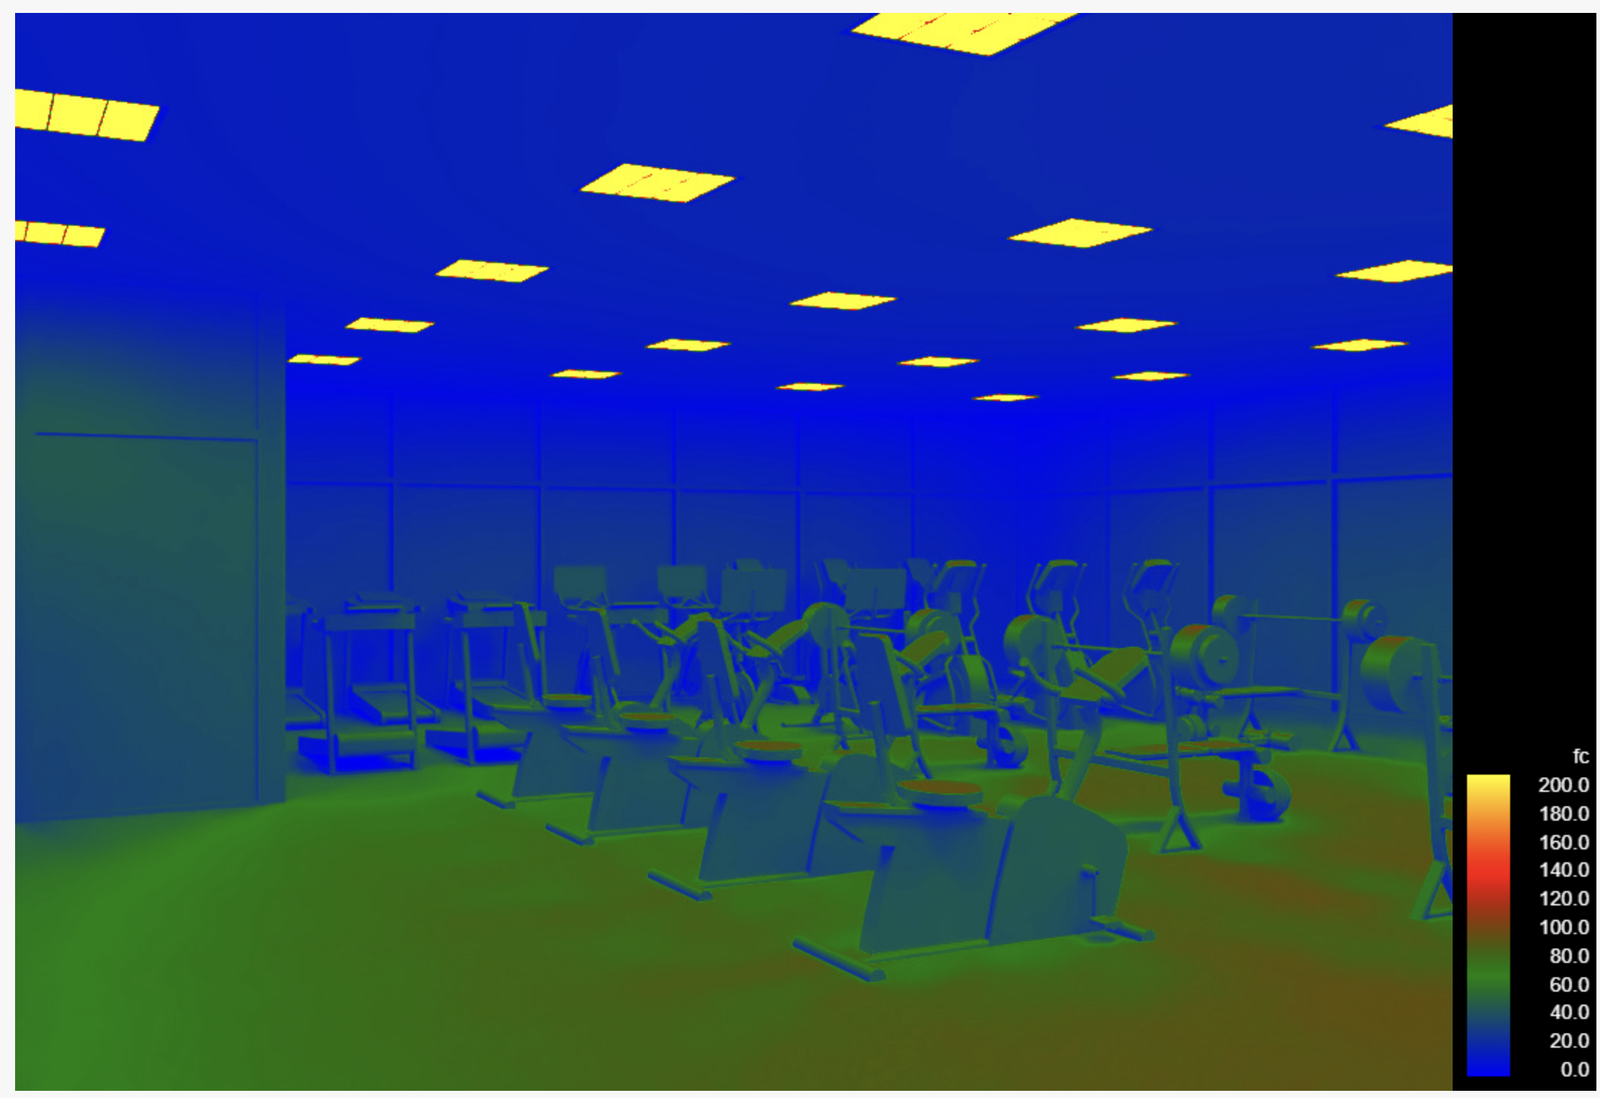
Scale = Fixed (0 to 200 fc)